Table of Contents
Online Help > Placemarks > Routes
How to create a route?
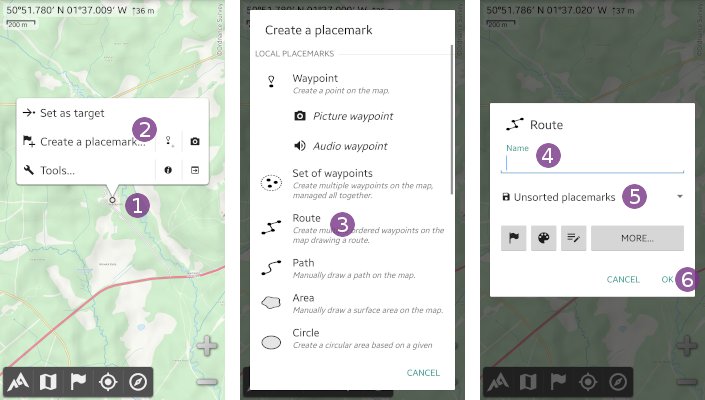
- Tap on the screen center icon
 and on
 “Create a placemark…” ;
; - Choose
“Route” ;
; - If desired, type a name in the
“Name” text field;
 - If desired, change the folder
 in which to save the route;
 - Tap on
“Ok” to validate.

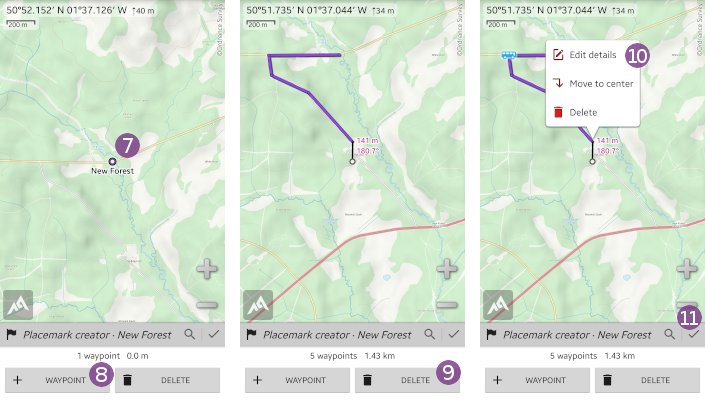
The edit mode is activated and a first waypoint is automatically added at the screen center ![]() . To add more waypoints:
. To add more waypoints:
- Move the screen center icon over the next location and tap on
“Waypoint” ;
; - If needed, you can delete the last added waypoint by tapping on
“Delete” .
.
While in edit mode, you can also edit any existing waypoint by tapping on it to display a popup menu. Tap on “Edit details” ![]() to edit the details of the waypoint (name, icon, color, description, etc.).
to edit the details of the waypoint (name, icon, color, description, etc.).
When finished, tap on the “Save & close” ![]() icon.
icon.

How to add, move or delete points of a route?
To add, move or delete points of a route you need to activate the edit mode of the route:
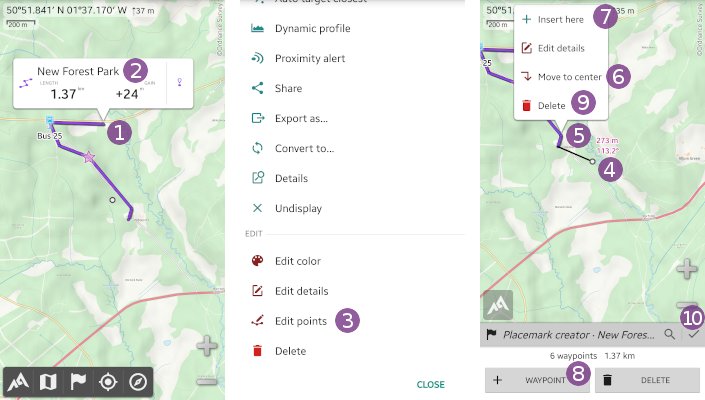
- Tap on any waypoint of the route you want to edit
 and on the route name
  ;
; - Scroll down the menu and choose
“Edit points” to activate the edit mode.
The edit mode of the route is activated. To add waypoints, just process as explained in the section above.
To move a waypoint:
- Move the screen center icon over the new location
 ;
; - Tap on the waypoint you want to move
 and on
 “Move to center” .
.
To insert waypoints after an existing waypoint:
- Tap on the existing waypoint
 and on
 “Insert here” ;
; - Tap on
“Waypoint” to add new waypoints.
To delete a waypoint:
- Tap on the waypoint
 and on
 “Delete” .
.
When finished, click on “Save & close” ![]() .
.

